One-Click Deployment
Deploy your fully designed backend to staging or production with a single action, monitor build progress, access live APIs, and track deployment history.
One-Click Deployment
After your infrastructure is ready and microservices are designed, Mindbricks allows you to deploy your entire backend to the cloud with a single click.
This step turns your designed system into a live, accessible backend, complete with URLs, logs, and runtime monitoring.
Deployment Environments
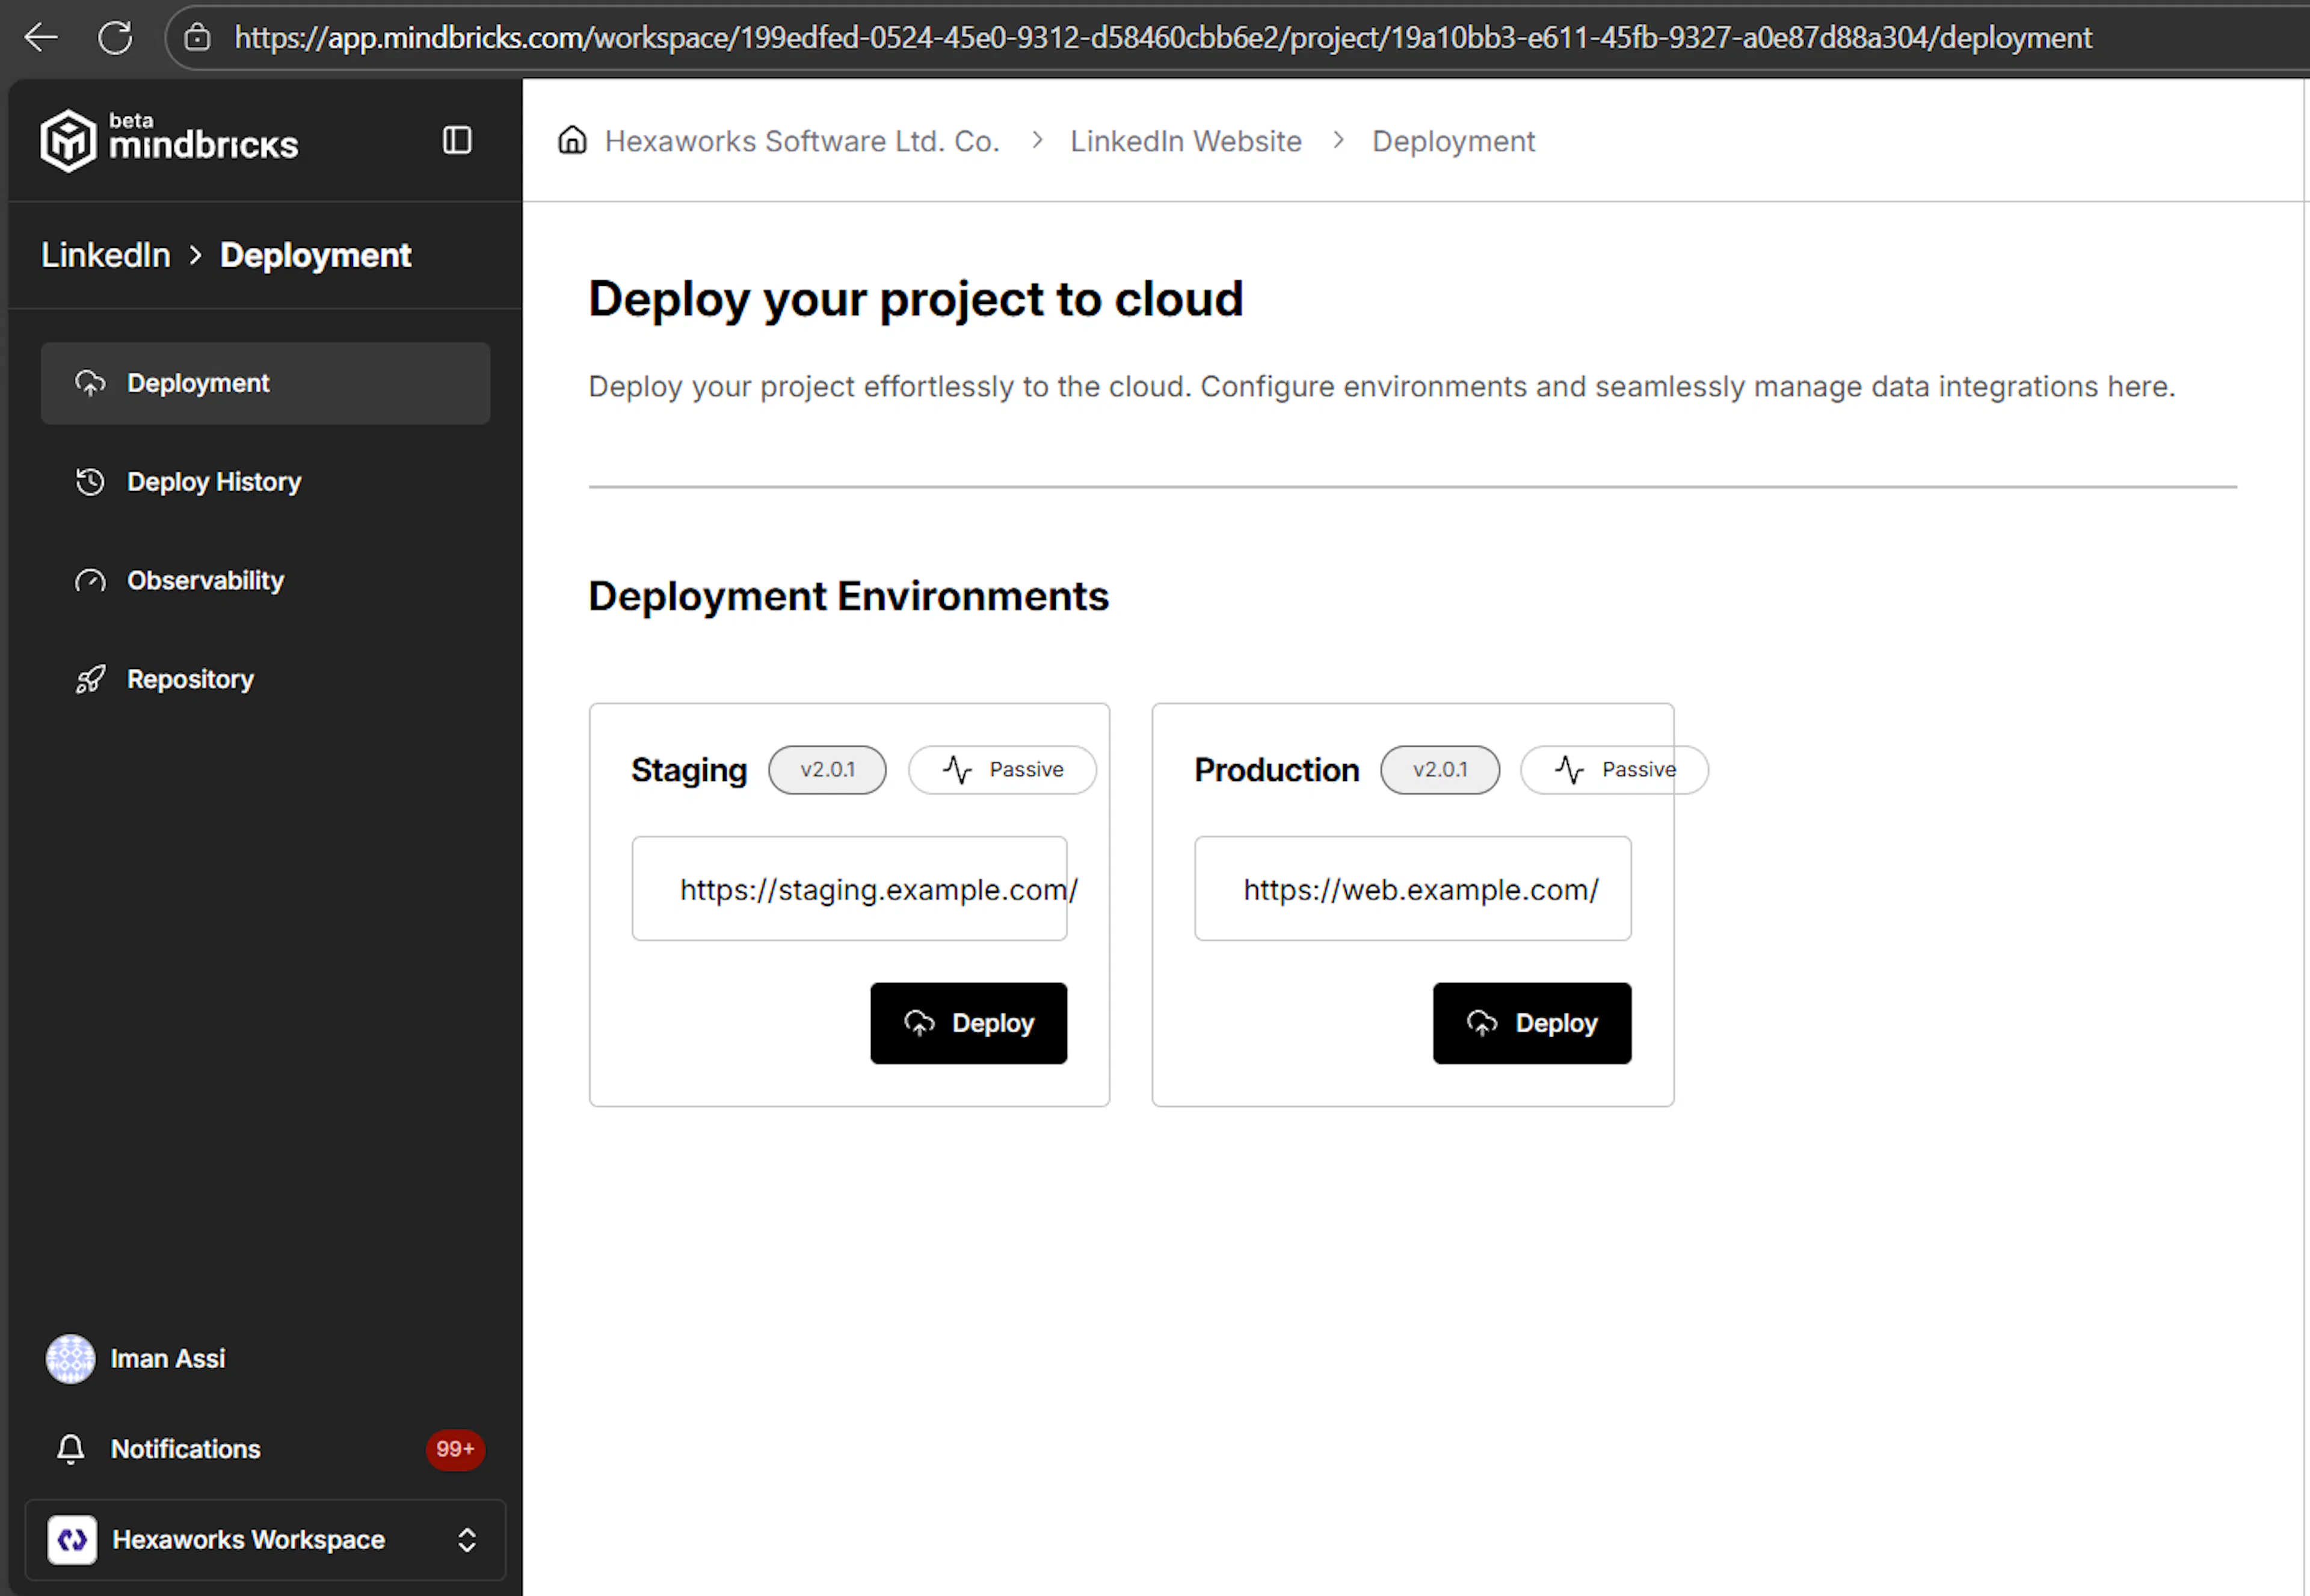
The main Deployment page shows the available deployment environments for your project.
By default, Mindbricks provides:
-
Staging – for testing, QA, and validation
-
Production – for live users and real traffic
Each environment displays:
-
Current deployed version
-
Deployment status (Passive, In Progress, Success)
-
Public service URLs (once deployed)
-
A Deploy button
Each environment is deployed independently, allowing controlled rollouts.
Deploying to an Environment
When you select an environment (for example Stage), you enter the environment-specific deployment view.
Selecting an Instance
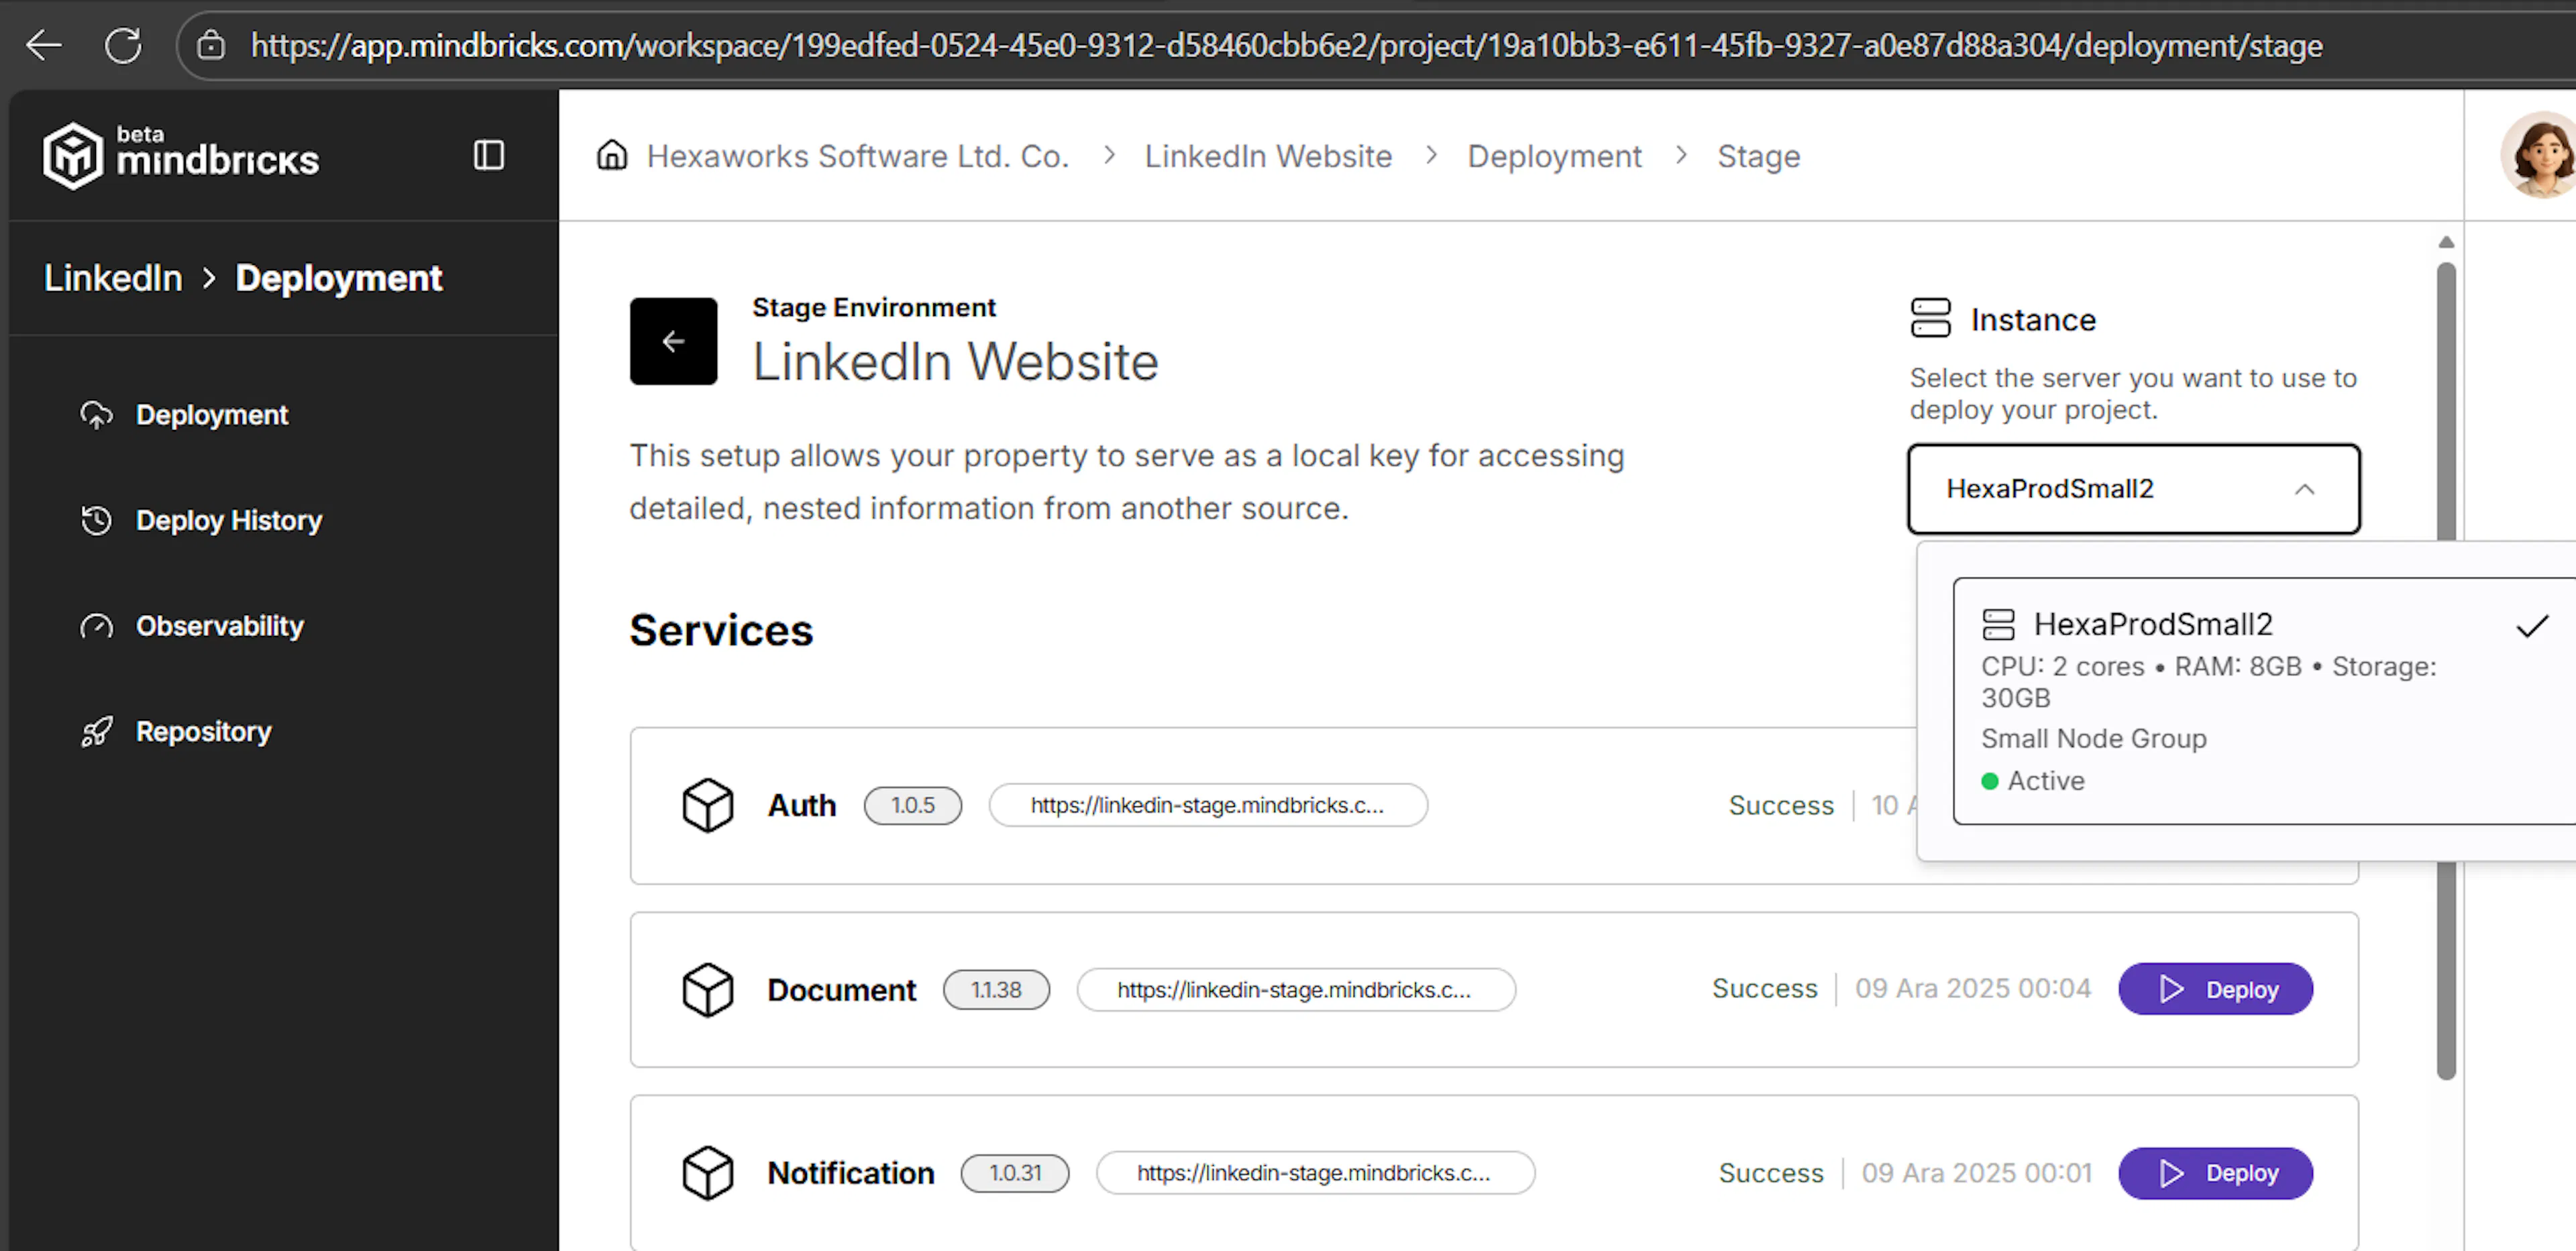
Before deployment begins, you must select the cloud server instance where the services will run.
-
Choose an instance from the dropdown
-
The instance must already exist in Cloud Servers
-
All services in this environment will run on that instance
Deploying Services
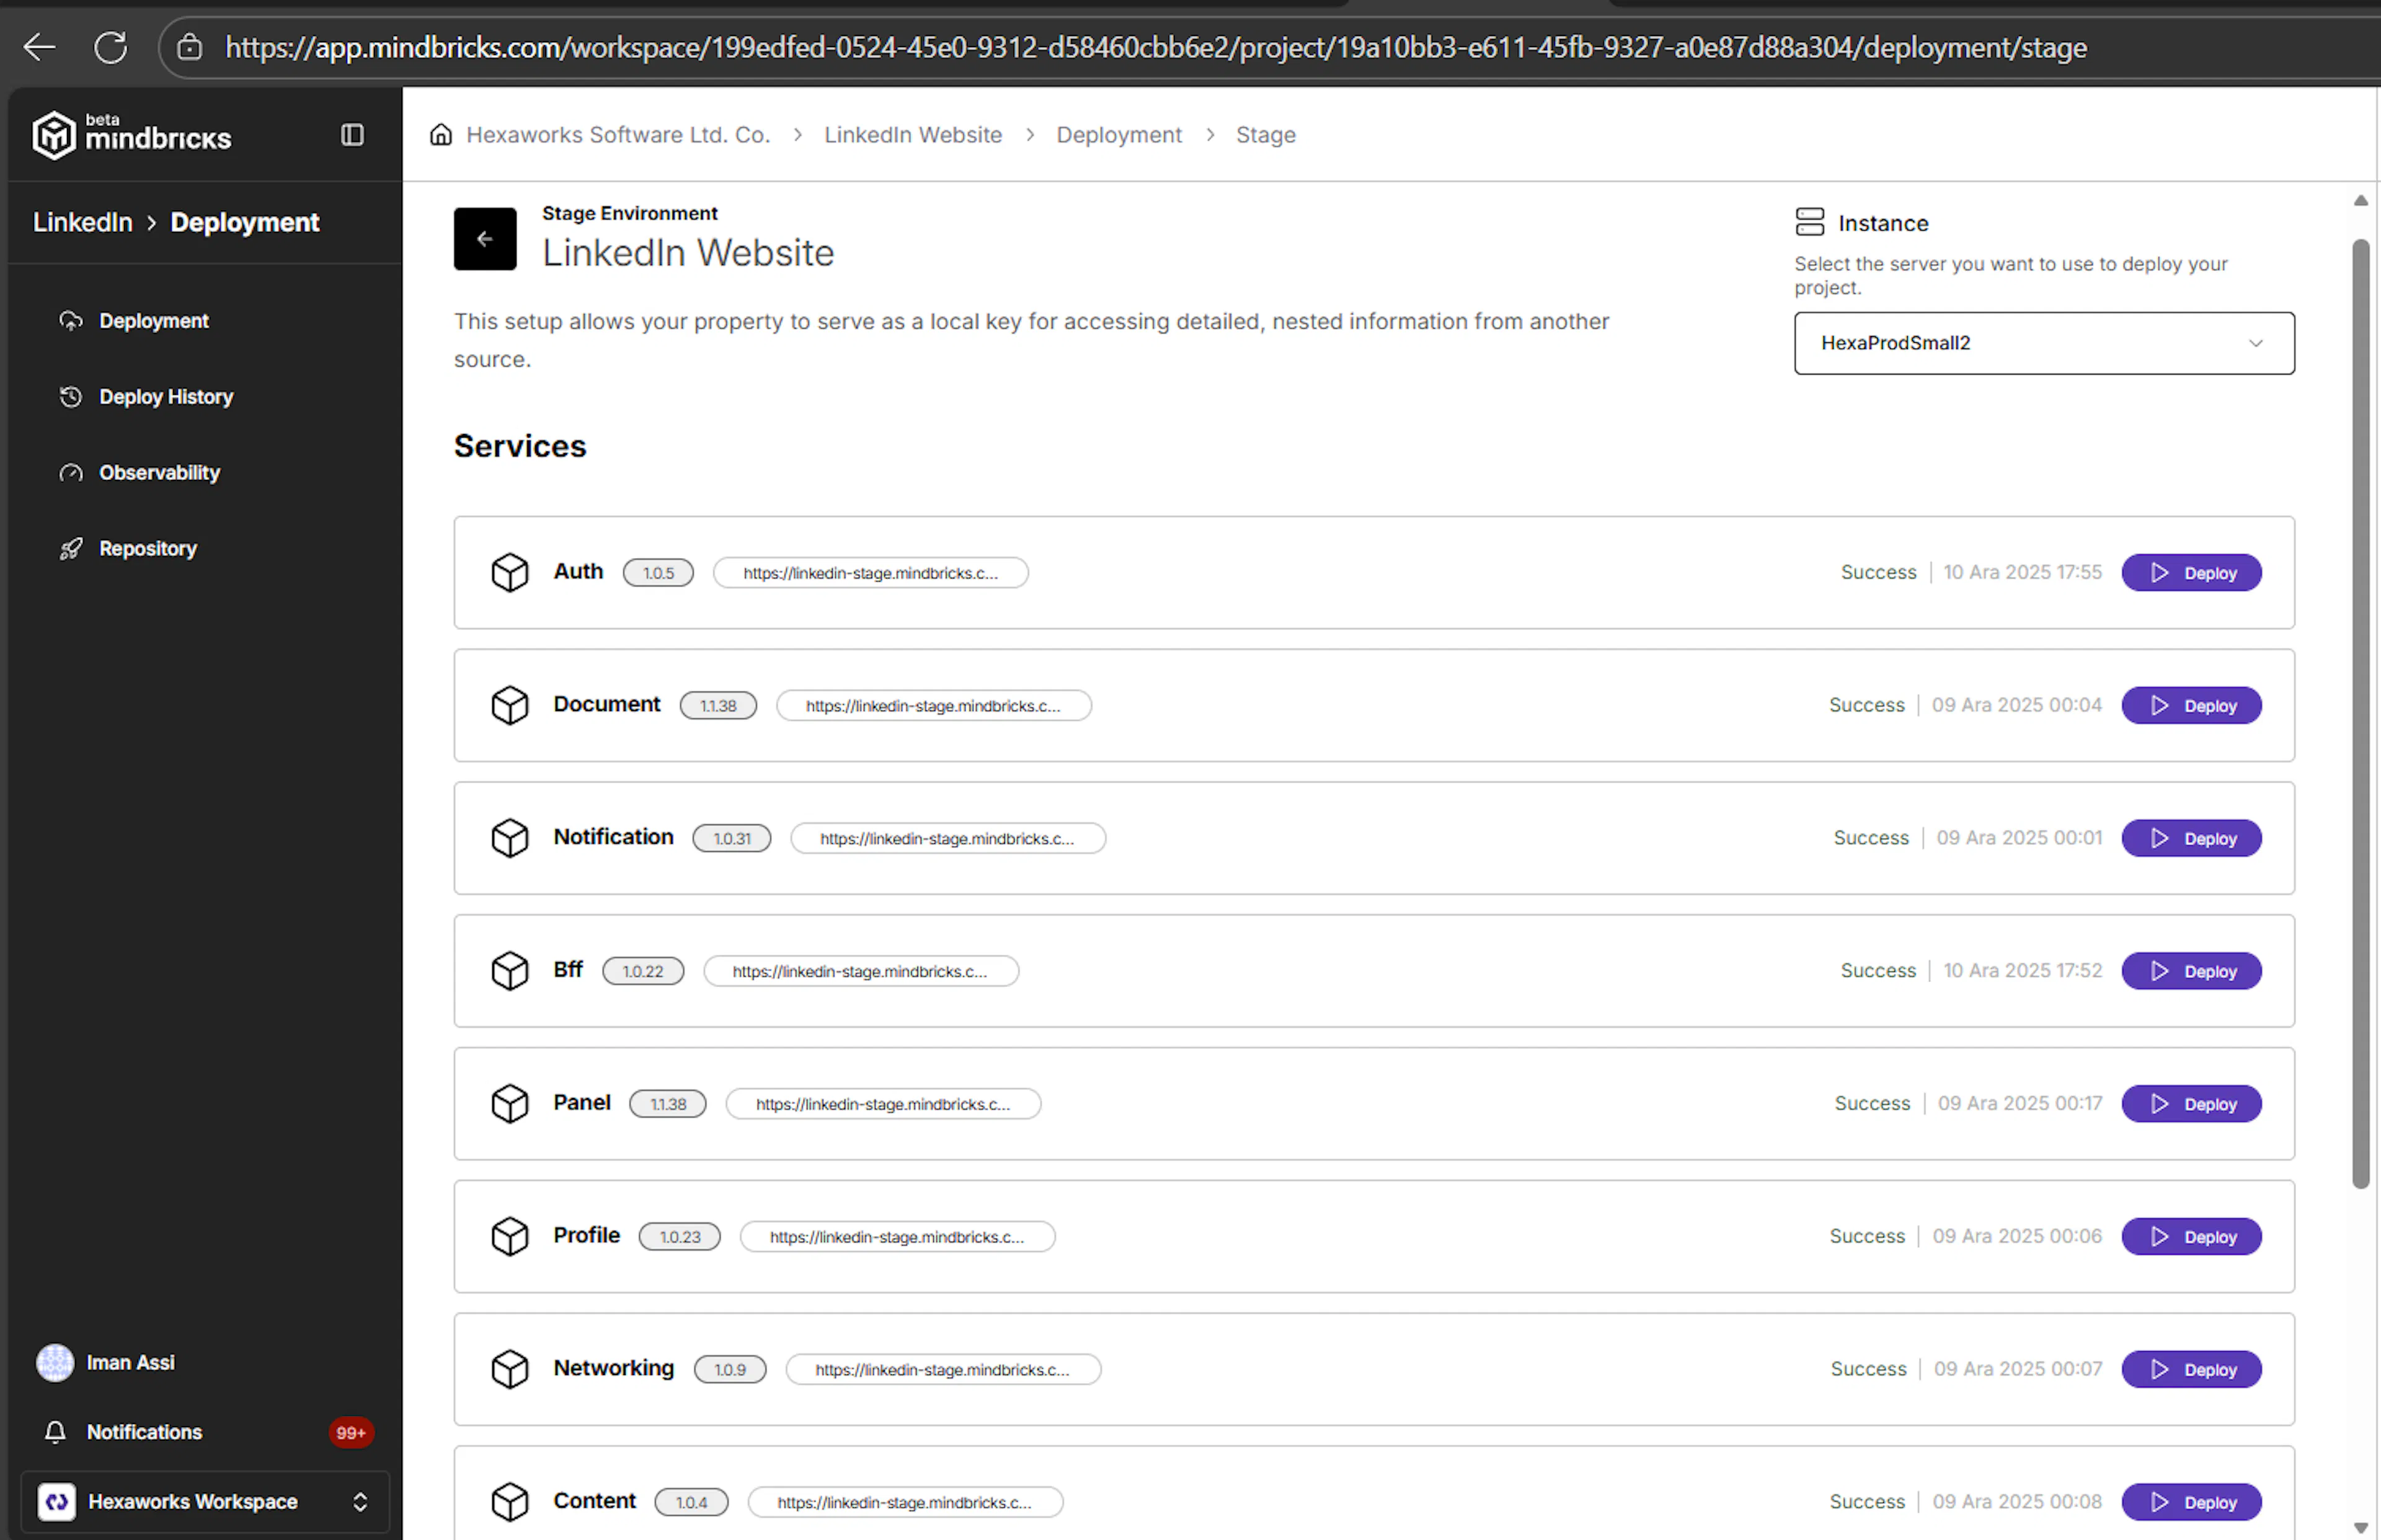
Once an instance is selected, all project services are listed.
For each service, you can see:
-
Service name
-
Current deployed version
-
Public service URL (if already deployed)
-
Deployment status
-
Last deployment timestamp
Clicking Deploy triggers deployment only for that service, allowing:
-
Incremental rollouts
-
Partial updates
-
Safe version upgrades
When a service’s code changes, its version is automatically incremented and reflected here.
Live Deployment Logs
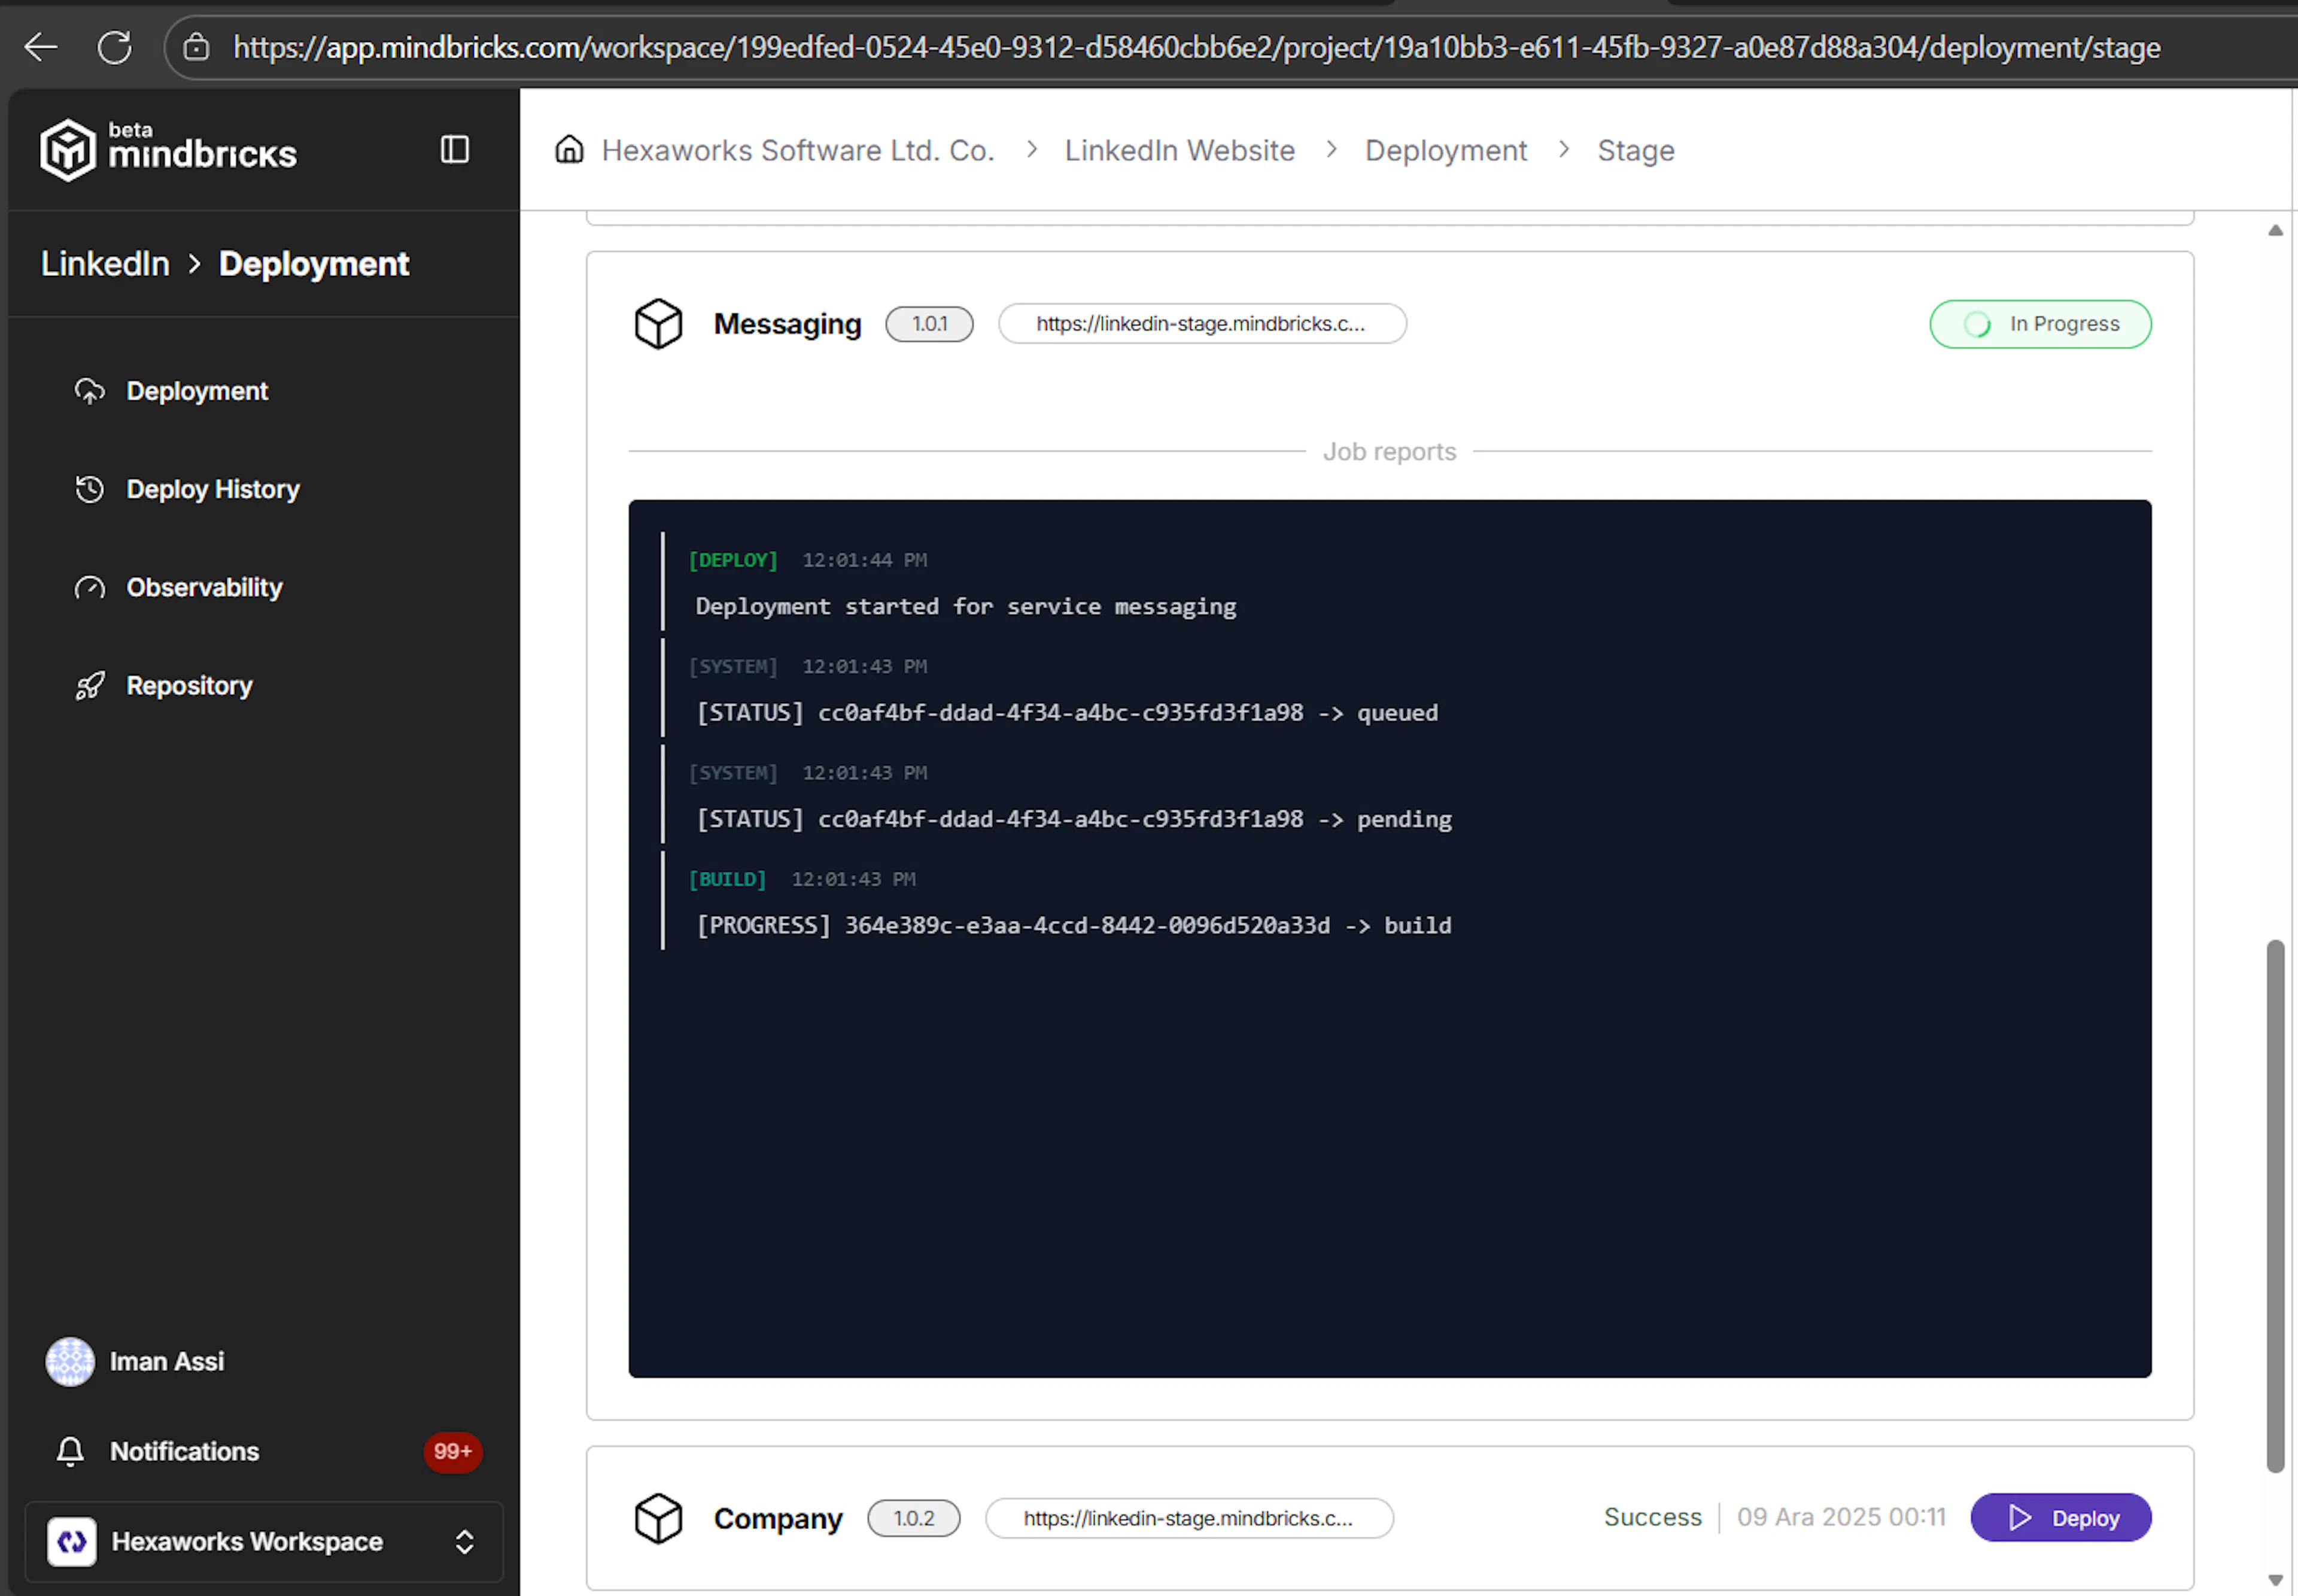
During deployment, Mindbricks shows real-time logs for each service.
These logs indicate:
-
Build start and completion
-
Queue and execution status
-
Deployment progress
-
Success or failure events
Once deployment completes successfully, the service status switches to Success, confirming it is live.
Live API Interface (Post-Deployment)
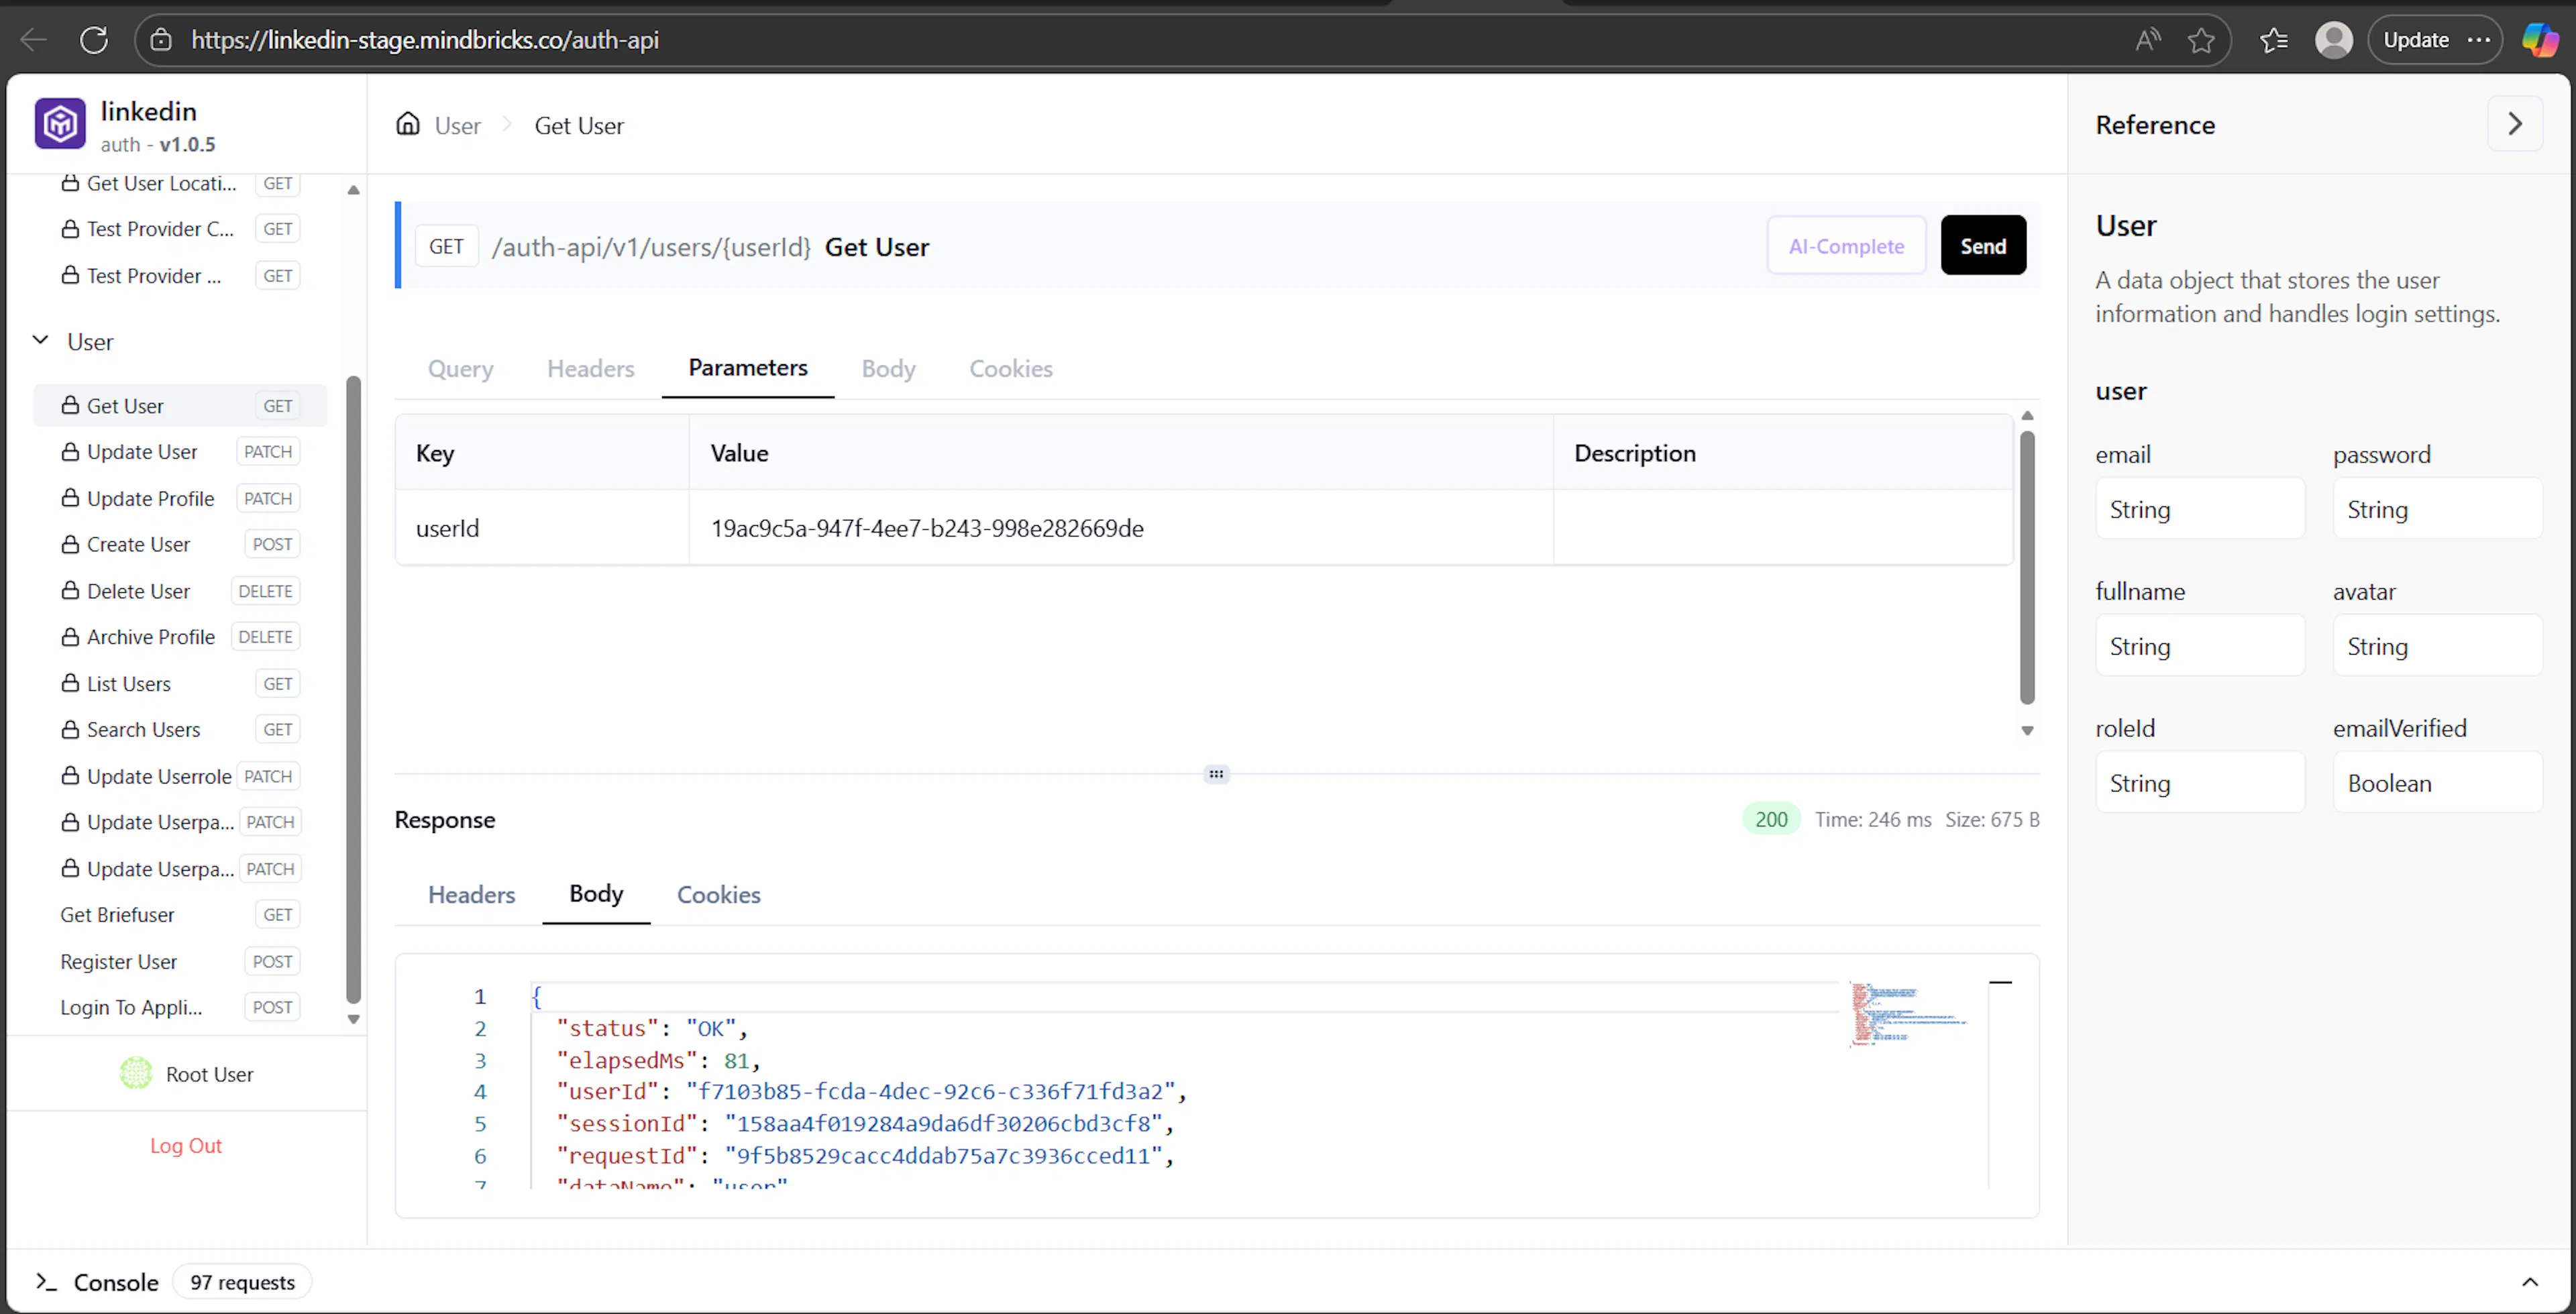
After deployment, each service exposes a live API interface.
This interface is identical to the Preview API Interface described earlier, with two key differences:
- No time limit – the API remains available as long as the server is running.
- Preview Tools are disabled – the floating preview actions menu is not available in the live API interface.
From here, you can:
-
Test live endpoints
-
Inspect real responses
-
Validate authentication and permissions
-
Connect frontend applications
Deployment History
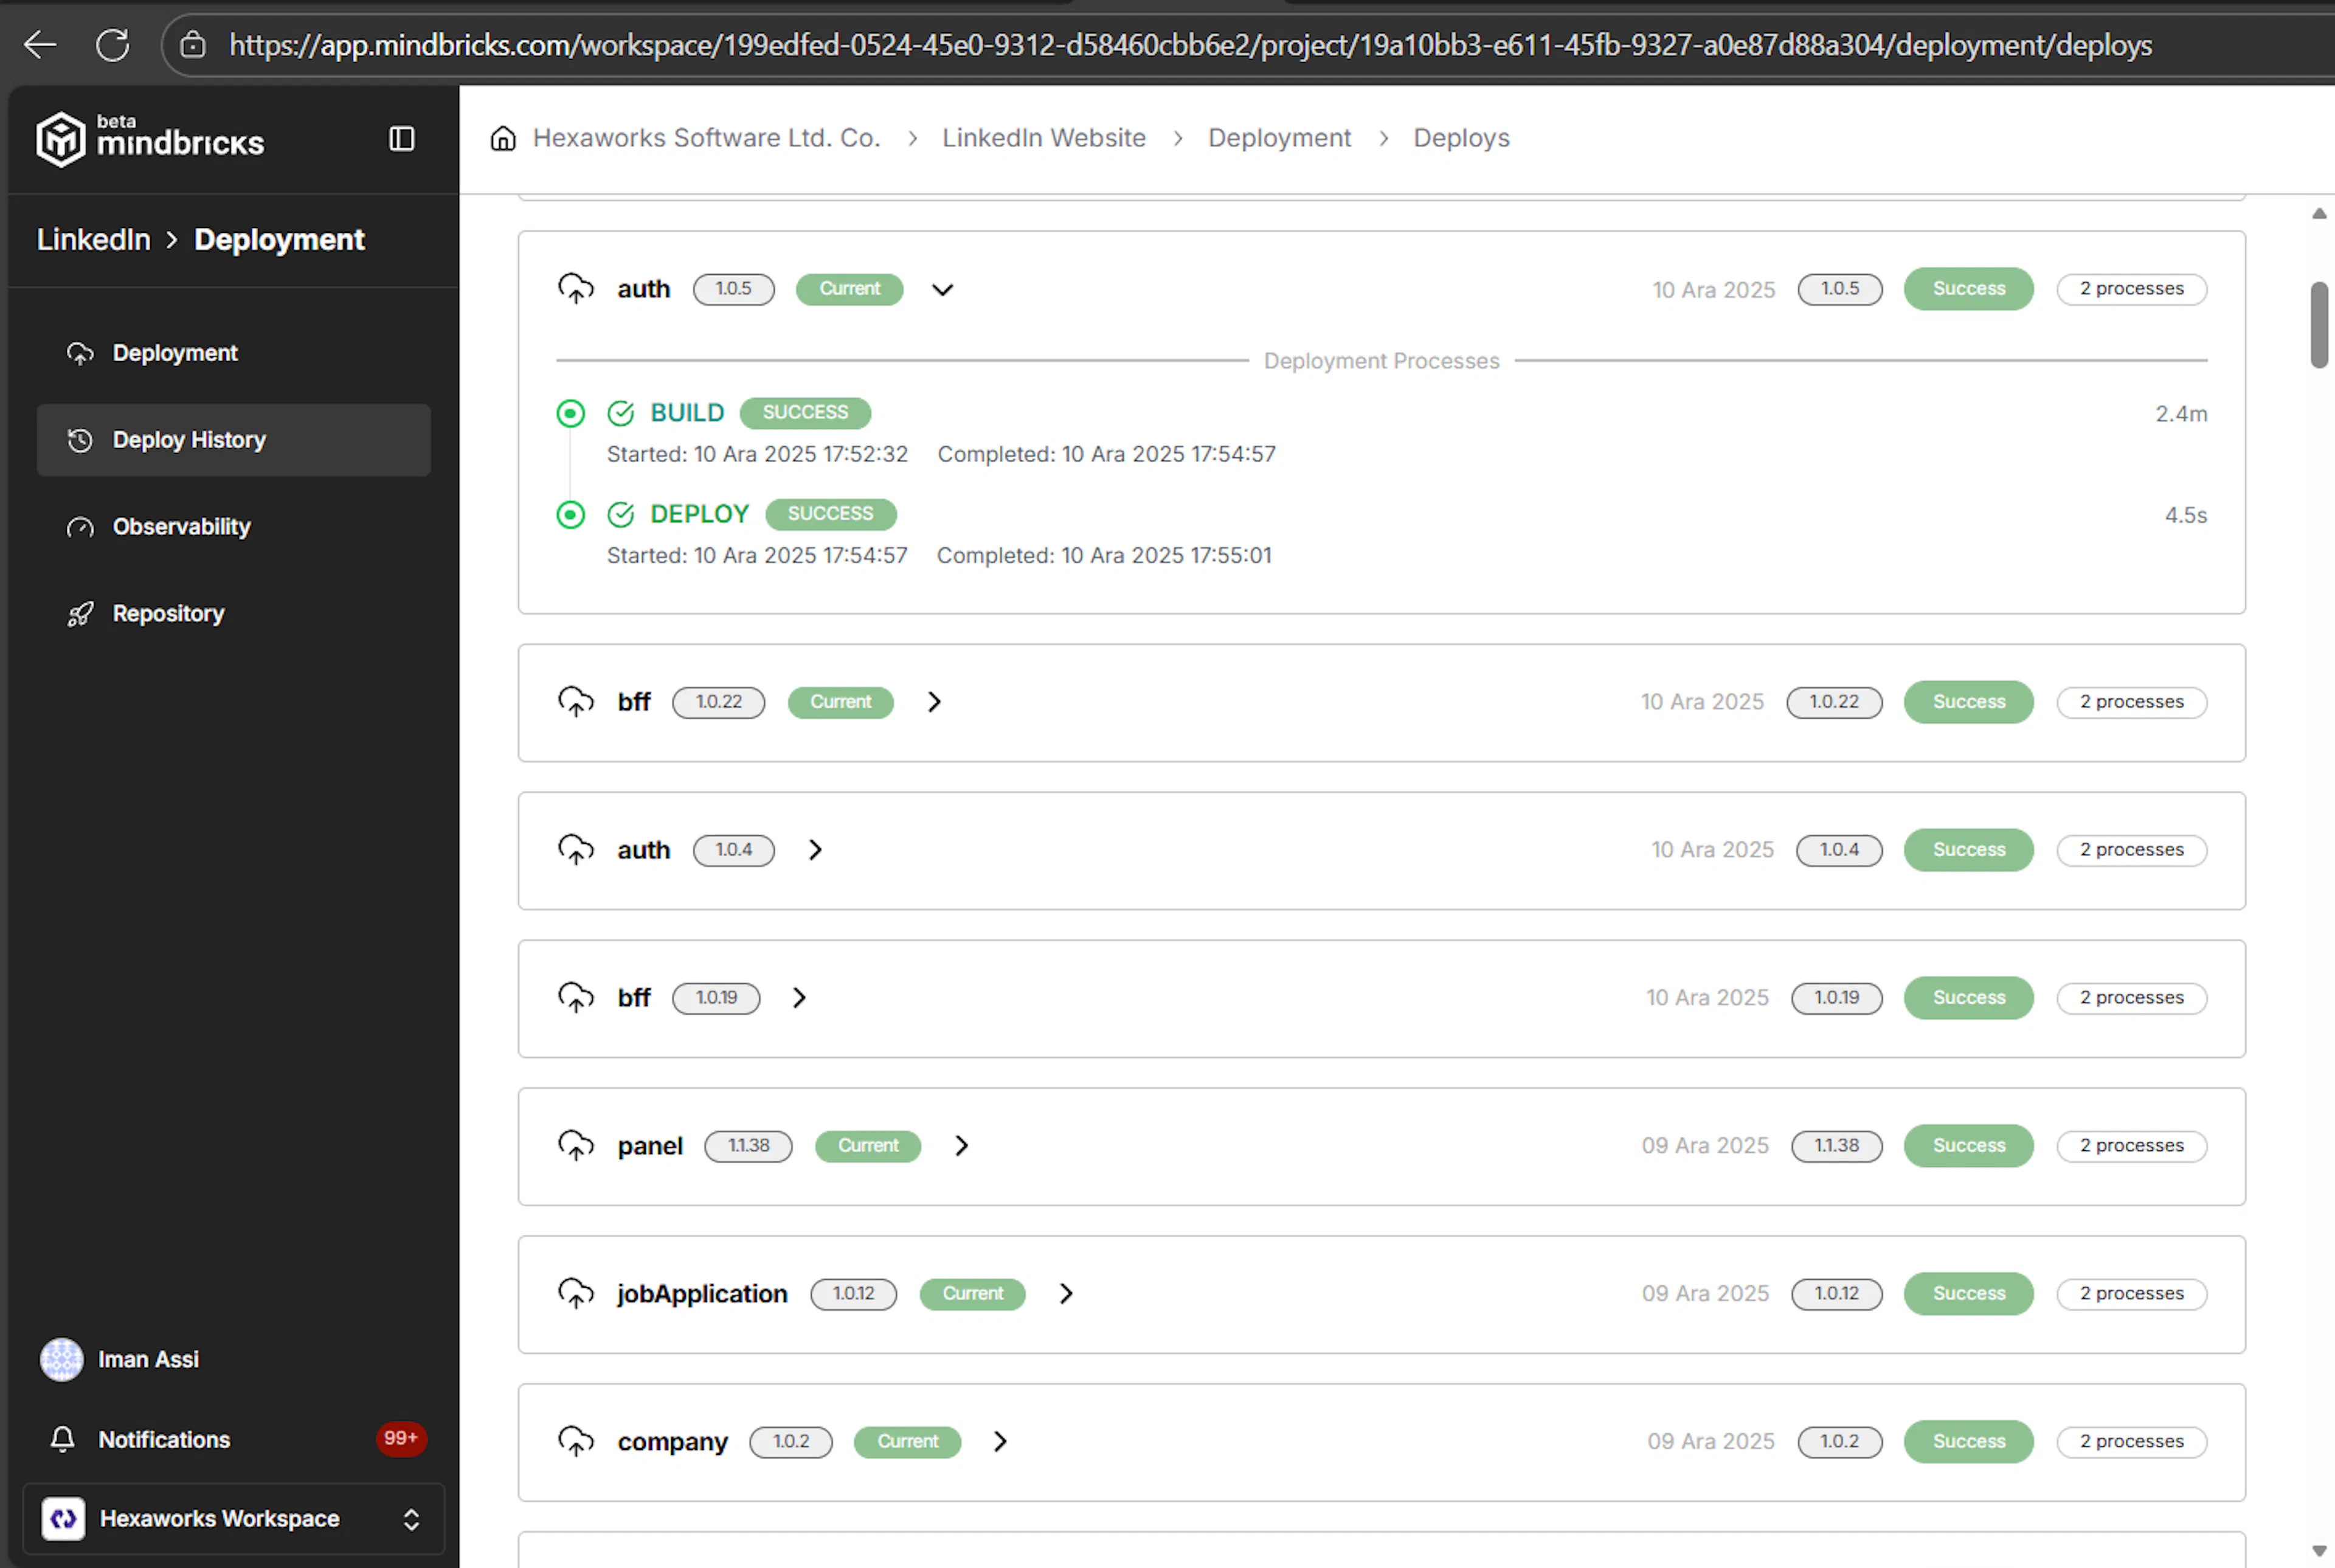
The Deploy History page keeps a full record of all deployment activity.
For each deployment, you can see:
-
Service name
-
Deployed version
-
Environment
-
Build duration
-
Deployment duration
-
Final status (Success / Failed)
This gives you traceability and confidence when managing releases.
Using Deployed APIs in Your Application
Once deployment is successful:
-
Each service receives a public subdomain
-
APIs are accessible from anywhere
-
You can connect:
-
Web frontends
-
Mobile apps
-
External systems
-
Third-party integrations
-
At this point, your project is a fully operational backend.
What One-Click Deployment Gives You
-
No manual DevOps setup
-
No CI/CD configuration required
-
Automatic builds and versioning
-
Live logs and history
-
Stable, persistent APIs
-
Production-ready infrastructure
This completes the journey from design → preview → deployment, all inside Mindbricks.